


Proper installation of weather stripping is crucial for maintaining the energy efficiency and comfort of your home. However, several common mistakes can undermine your efforts. This article will guide you through how to install weather stripping on a door, the top weather stripping mistakes, and how to avoid them, ensuring a successful installation.
Key Takeaways
- Accurate measurements are essential to avoid gaps and ensure a proper seal.
- Choosing the right type of weather stripping for your specific needs is crucial.
- Proper surface preparation is necessary for effective adhesion and longevity.
- Regular maintenance and timely replacement of weather stripping can prevent energy loss.
- Avoiding common installation mistakes can save you time, money, and effort in the long run.
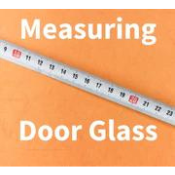
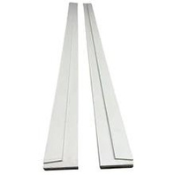
1. Incorrect measurements while installing weatherstripping
Accurate measurements are crucial for the proper installation of weather stripping. Incorrect measurements can lead to an ill-fitting seal, which compromises the effectiveness of the weather stripping. Here are some common measurement mistakes and how to avoid them.
-
Common measurement mistakes
One of the most frequent errors is not ensuring the tape measure is flat and straight for a precise reading. This can result in inaccurate measurements and an ill-fitting seal. Another common mistake is failing to measure both the width and height of the door frame, leading to mismatched weather stripping.
-
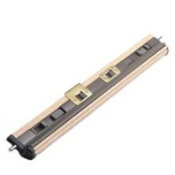
Tools for accurate measurements
Using the right tools can make a significant difference. A quality tape measure, a straight edge, and a level are essential for accurate measurements. Digital measuring tools can also provide more precise readings.
-
Tips for precise measurements
- Always double-check your measurements before cutting any material.
- Measure twice, and cut once to avoid wasting materials.
- Make a note of these measurements and keep them handy during installation.
- Ensure the tape measure is flat and straight for a precise reading.
- Use a level to check that your measurements are even and accurate.
By following these proper installation tips, you can avoid common pitfalls and ensure a seamless fit and lasting efficiency for your weather stripping.

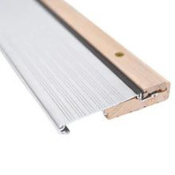
2. Choosing the wrong type of weather stripping
Selecting the appropriate weather stripping for your needs is crucial to ensure effective insulation and energy efficiency. Weatherstripping mistakes can lead to drafts, increased energy bills, and even damage to your doors and windows. Here’s how to avoid these weather-stripping mistakes.
-
Different types of weather stripping
There are several types of weather stripping available, each suited for different applications. Common types include:
- Foam tape: Ideal for irregular gaps and cracks.
- V-strip: Perfect for sealing the sides of doors and windows.
- Door sweeps: Best for the bottom of doors to block drafts.
-
Rubber or vinyl gaskets: Suitable for sliding glass doors and windows.
-
Factors to consider when choosing
When selecting weather stripping, consider the following factors:
- Climate: The material should withstand the weather conditions in your area.
- Door or window type: Different materials work better with specific types of doors and windows.
- Durability: Choose a material that will last and not require frequent replacement.
- Ease of installation: Some types are easier to install than others, which can be a deciding factor for DIY projects.
-
Common mismatches and their consequences
Using the wrong type of weather stripping can have several negative effects:
- Poor sealing: Inadequate sealing can lead to drafts and higher energy bills.
- Damage to doors and windows: Incorrect materials can cause wear and tear, leading to costly repairs.
- Frequent replacements: Using a less durable material may mean you have to replace the weather stripping more often, increasing long-term costs.
Consulting with door experts can help you choose the right type of weather stripping for your specific needs, ensuring a proper seal and long-lasting performance.
3. Improper surface preparation
Proper surface preparation is a crucial first step of how to install weather stripping on a door. Neglecting this step can lead to inadequate sealing and reduced performance.

-
Importance of surface preparation
Surface preparation ensures that the weather stripping adheres properly and provides a tight seal. Without it, you risk gaps that let in moisture and drafts, compromising the effectiveness of the weather stripping.
-
Steps for proper surface cleaning
- Remove old weather stripping: Carefully peel off any existing weather stripping and clean the surface of any adhesive residue.
- Clean the surface: Use a mild detergent and water to clean the area where the new weather stripping will be applied. Ensure the surface is dry before proceeding.
- Inspect for damage: Check for any cracks or damage on the surface. Repair any issues before installing the new weather stripping.
- Sand the surface: Lightly sand the area to create a smooth, even surface for better adhesion.
- Wipe down: Use a clean, dry cloth to remove any dust or debris from sanding.
-
Common preparation mistakes
- Skipping surface cleaning: Failing to clean the surface can result in poor adhesion and ineffective sealing.
- Ignoring surface damage: Installing weather stripping over damaged areas can lead to premature failure.
- Using the wrong tools or techniques: Ensure you use the appropriate tools and follow the correct techniques for surface preparation to avoid issues.
By following these steps and avoiding common mistakes, you can ensure a successful weather-stripping installation that provides long-lasting protection against drafts and moisture.
4. Ignoring maintenance and replacement
Ignoring maintenance and replacement of weather stripping can lead to a host of problems that could have been easily avoided. Regular maintenance ensures that your weather stripping remains effective in sealing out drafts and moisture, which can save you money on energy bills and prevent structural damage to your home.
Ignoring maintenance and replacement of your doors can lead to costly repairs and decreased efficiency. Regular upkeep ensures longevity and optimal performance. Don't wait until it's too late! Visit Peasedoors to explore our range of maintenance products and expert advice.
Conclusion
Ensuring a successful weather stripping installation requires attention to detail and adherence to best practices. By avoiding common mistakes such as incorrect measurements, choosing the wrong type of weather stripping, improper surface preparation, and neglecting maintenance and replacement, you can enhance the efficiency and longevity of your weather stripping by following our guide on how to install weather stripping on a door. Proper installation not only improves energy efficiency but also contributes to the overall comfort and durability of your home. Take the time to do it right, and you'll reap the benefits for years to come.
Frequently Asked Questions
1. Why is accurate measurement important when installing weather stripping?
Accurate measurement ensures that the weather stripping fits properly, creating an effective seal to prevent drafts and moisture from entering your home.
2. What are the common types of weather-stripping available?
Common types of weather stripping include adhesive-backed foam tape, V-strip (tension seal), door sweeps, and tubular rubber or vinyl gaskets.
3. How do I choose the right type of weather stripping for my needs?
Consider factors such as the type of door or window, the climate in your area, and the level of insulation required. It's also important to check the manufacturer's recommendations.
4. What steps should I take to prepare the surface before installing weather stripping?
Clean the surface thoroughly to remove dirt, dust, and old adhesive. Ensure the surface is dry and smooth to ensure proper adhesion of the new weather stripping.
5. How often should weather stripping be replaced?
Weather stripping should be inspected annually and replaced if it shows signs of wear and tear, such as cracks, gaps, or loss of elasticity.
6. What are the consequences of neglecting weather stripping maintenance?
Neglecting maintenance can lead to drafts, increased energy bills, moisture damage, and reduced comfort in your home.