Lockset Installation
Installation Instructions for Emtek Locks
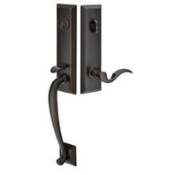
Installation Instructions for Arts & Crafts, Lexington, Georgetown, Newport, Chateau, and Athens locks

1. Remove existing lockset
- Unscrew faceplate and handles
- Remove deadbolt and latch
- Unscrew strike plates from jamb (optional -- sometimes you can reuse your existing strike plates)
- Install deadbolt into upper hole (extend deadbolt using flat head screwdriver or the tail piece of the key cylinder and install facing "up" with the "X" on the bottom)
- Screw latch plate onto door edge
- Install latch into lower hole (curved portion of latch should face towards the lock jamb)
- Screw deadbolt plate onto door edge
- NOTE: DO NOT SCREW FACEPLATE TO DOOR UNTIL AFTER TESTING FOR SMOOTH OPERATION IN STEP 6
- Insert key cylinder into collar and then onto exterior faceplate
- Hold exterior faceplate up to outside of door with the tail piece or torque blade from the key cylinder going through the deadbolt in the vertical position
- Using the two long screws, fasten [do not overtighten -- some doors are slightly thinner than 1.75" and the screws can dimple the front face of the key cylinder if screwed in with excessive force] adaptor plate to the inside of the deadbolt hole, with the screws passing through the adaptor plate and into the key cylinder (the torque blade from the key cylinder should pass through the center hole of the torque blade and we recommend having a friend hold the exterior faceplate and key cylinder in place while performing this step)
- NOTE: DO NOT SCREW FACEPLATE TO DOOR UNTIL AFTER TESTING FOR SMOOTH OPERATION IN STEP 6
- Hold interior faceplate to inside of door, with the turn knob in the horizontal “locked” position. If interior faceplate does not sit flush against door, be sure torque blade is inserted fully into knob. If needed, bend & break torque blade with pliers to shorten to
fit door thickness. - Insert spindle (metal rod for handles to turn latch) through latch in a diamond position (corners at 12-3-6-9 o’clock)
- Center spindle and remove set screws from handles with Allen wrench
- Place plastic bushings onto each side of the spindle
- Attach handles and loosely tighten set screws [DO NOT APPLY THREADLOCKER UNTIL AFTER STEP 6]
- Note: Depending on your old strike plates, you may need a chisel or flat head screwdriver and hammer to enlarge the mortise or cut out area for the new plate to recess and sit flush
- Screw deadbolt strike plate into lock jamb (note, for added security, use longer screws -- we recommend ~2-3" wood screws that will go through the jamb and into stud behind)
- Screw latch strike plate onto lock jamb
- Test throwing the deadbolt with door open and then with door closed
- Test turning the handle and opening the door
- Test closing the door
- You may need to gently align or nudge the lockset so that it is centered and turns/operates smoothly
- Also check to make sure that your hinges are tight and that your door is hanging square in its opening
- Drill pilot holes for faceplate screws
- Install faceplate screws
- Remove set screws from handles
- Apply threadlocker to handle set screws
- Tighten handle set screws and wipe clean excess threadlocker
- If your lock feels a little "tight" at first that is OK! Some locks (especially on older doors that may be a bit out of alignment) will take 1-2 weeks of normal use to "settle in" and operate smoothly
- If after 2 weeks the lock is still sticky, you may need to remove set screws and re-align the lock


