
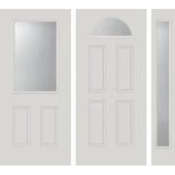


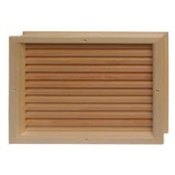
Door Glass Installation
Instructions
1. Remove screw caps to expose screws (should be on the inside of the home, if installed properly). If the caps are painted over and difficult to remove, try a small flathead screwdriver and mallet/hammer to cut or knock them free.
2. Use a utility knife to score around the interior and exterior door glass frames to cut through any existing paint
3. With a friend outside holding the glass firmly into the door, remove screws. If screws strip out, try a stripped screw tool or you can use a drill to drill out the screws
4. Remove interior frame
5. Remove exterior frame and glass unit
6. Clean the opening
7. Place the new glass unit & exterior frame assembly into the cut-out opening. The exterior frame does not have screw holes and typically comes pre-caulked to the insulated glass unit. Install this assembly from the outside of the home.
8. While a friend holds the exterior frame and glass unit into the door from outside of the home, attach the interior frame (the one with screw-holes). WARNING: FOR LARGE GLASS UNITS AND UNITS WITH NEW SEMI-STICKY CAULKING WE RECOMMEND REMOVING DOOR FROM HINGES AND INSTALLING BY LAYING DOOR ON TOP OF GLASS AND EXTERIOR FRAME ASSEMBLY. IF INSTALLING IN UPRIGHT DOOR, MAKE SURE TO HAVE TWO HELPERS, ONE TO INSERT GLASS AND FRAME FROM EXTERIOR OF HOME AND ONE TO HOLD THE GLASS FROM THE INSIDE OF HOME WHILE THE THIRD PERSON ATTACHES THE INTERIOR FRAME AND SCREWS EVERYTHING TOGHTER.
9. Fasten screws tightly (set power drills to low torque setting, do not exceed 15 in-lbs of torque)
10. Cover screws with provided screw caps (if no caps are available, you can also use white putty and smooth over with your thumb, then add wood grooves with a fingernail)