


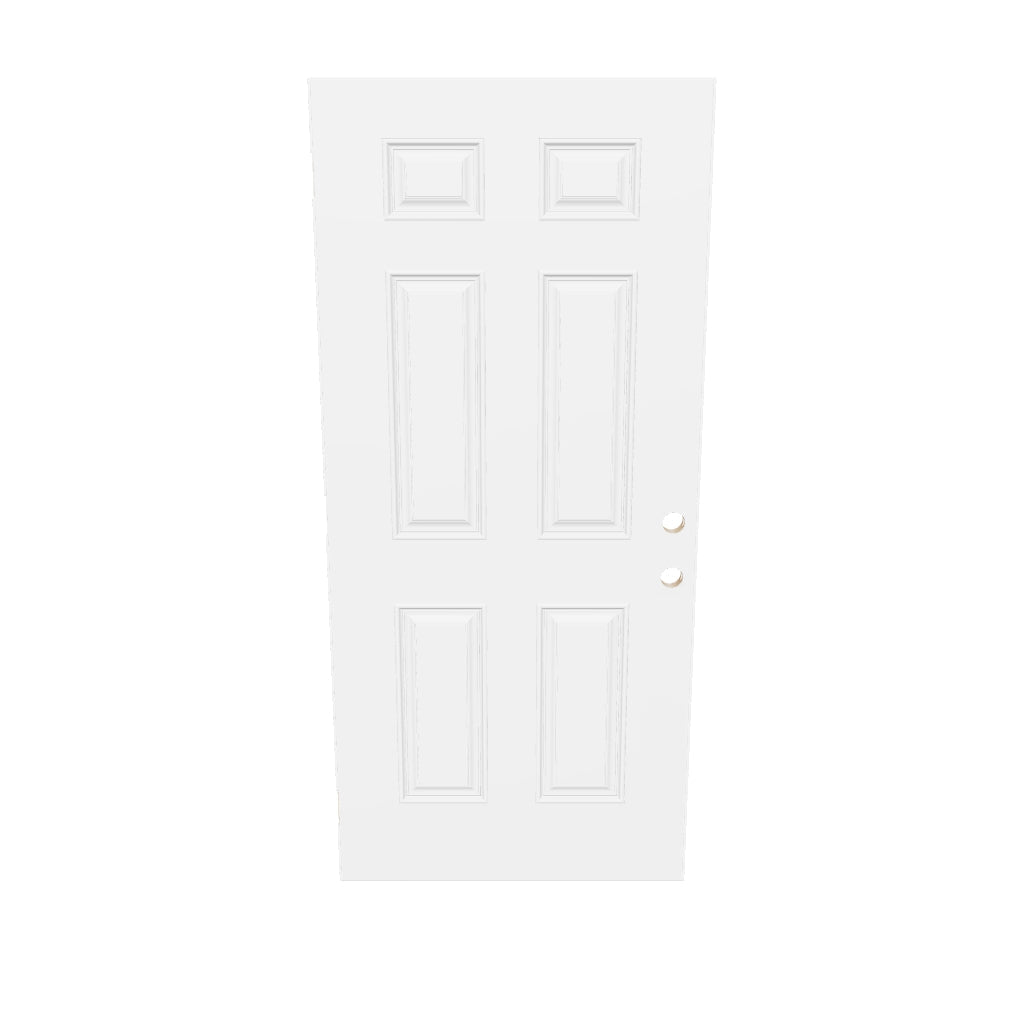


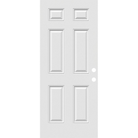


Steel Entry Door Slab (6 Panel)
The Pease Steel Door. Replace just your door slab and keep your existing jambs and brickmold. Change just your door slab and keep your existing jambs, inside trim, and exterior brickmold.
A perfect replacement for Pease Everstraight and Homestead doors as well as most entry doors by Stanley, Taylor, Mastercraft, Perma Door, Castlegate, Masonite, Therma Tru, Jeld-Wen, Plastpro, and many others. Please make sure to check your measurements (door height, width, and thickness) and feel free to email us with any measurement or fit questions.
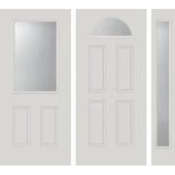
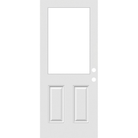
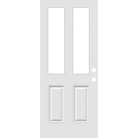
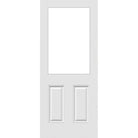
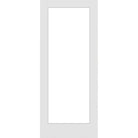
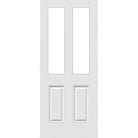
Classic 6 Panel style. Looks great with or without glass. Glass selections below come installed into the door using our standard profile plastic door glass frames. Additional glass options can be found in our door glass section.
Sizes & Measurements:
Style: 6 Panel
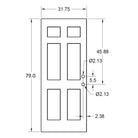
31.75" x 79":
- Slab width: 31.75" (referred to nominally as a 32", 2/8, or 2-foot-8-inch-wide door)
- Slab height: 79.0" (referred to nominally as an 80" or 6' 8" tall panel)
- Panel Thickness: 1.75"
- Select 6 Panel (no cut out), With Glass: Clear Half Lite (installed), With Glass: Clear Full Lite (installed), Without Glass: Half Lite 23" x 37" Cut Out, Without Glass: Full Lite 23" x 65" Cut Out
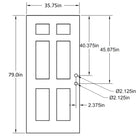
35.75" x 79":
- Slab width: 35.75" (referred to nominally as a 36", 3/0, or 3-foot-0-inch-wide door)
- Slab height: 79.0" (referred to nominally as an 80" or 6' 8" tall panel)
- Panel Thickness: 1.75"
- Select 6 Panel (no cut out), With Glass: Clear Half Lite (installed), With Glass: Clear Full Lite (installed), Without Glass: Half Lite 23" x 37" Cut Out, Without Glass: Full Lite 23" x 65" Cut Out
Need help measuring your rough opening? Our free SmartFit tool guides you through every measurement so you order the right size the first time. Get started → smartfit.peasedoors.com
Prep & other specifications:
- Select either No Hinge or Lock Prep or Standard Hinge & Lock Prep:
- No Hinge or Lock Prep: allows for lock placement as desired and hinge side edge unfinished and can be mortised for hinge placements as needed
PEASE Standard Hinge & Lock Prep 79" tall doors:
- Hinge mortise (cut out) 6.5" from top of door to top of first hinge, 37.5" to top of second hinge, 68.5" to top of bottom hinge
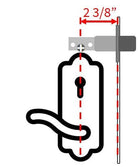
- Tubular lock prep comes for 2 3/8" backset lockset and means the door will have two 2.125" holes 5.5" apart, each hole 2 3/8" from the center of the hole to the edge of the door, with the top hole center 40.375" from the top edge of the door
- Trimming: We do not recommend trimming this door. If you need to trim your door please contact us.
Note: This is a replacement for most entry doors (front, kitchen, side, garage/man door, etc.) but will often not work as a replacement for patio doors which are typically shorter in height.