SKU: SPD361-SFG-LH4-SN-6PN-PREHUNG

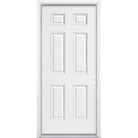
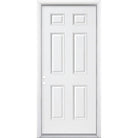
36" x 80" Smooth Fiberglass Entry Door & Framing Kit (6 Panel)

$699.00 $1,299.00

Kit ships "knocked down" for assembly at job site

Handing and jamb depth
Finish
Glass options
3 in stock
Description

The Pease Fiberglass Door. This is not your big-box store, builder-grade door. Our premium fiberglass door system is built to seal tightly against the elements, impress your neighbors, and last a lifetime.

Door slab and framing kit includes everything you need (except a power drill, caulking, shims, and a few other tools) to install a new door or replace an existing one. Ships "knocked-down" (KD) for assembly on site.

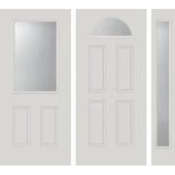
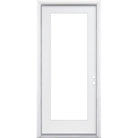
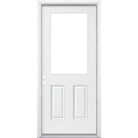
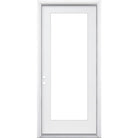
Classic 6 Panel style. Looks great with or without glass. Additional glass options can be found in our door glass section. 

Measurements:

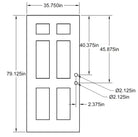
  • Unit size (jambs, not including brickmold) width: 37.5"
  • Unit size (jambs, not including brickmold) height: 81.75"
  • Rough opening width: 38" to 38.5"
  • Rough opening height: 82" to 82.5"
  • Slab Height: 79.0 (known as an 80" or 6' 8" tall door)
  • Slab Width: 35.75 (known as a 36", 3/0, or 3 foot wide door)
  • Slab Thickness: 1.75
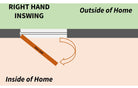
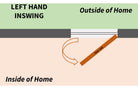
  • Select Left Hand Inswing or Right Hand Inswing. See pictures for help determining door handing. Pictures show the door from the outside of home viewpoint
  • Depth: Select 4 9/16" or 6 9/16" Jamb Depth
    • 4 9/16" are standard depth jambs for use with typical (2x4) construction
    • 6 9/16" are extended depth jambs for use with (2x6) construction
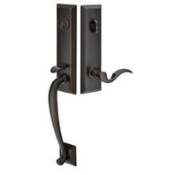
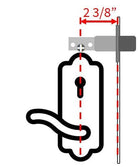
  • Lock prep: Comes with standard tubular lock prep for 2 3/8" backset lock. This means the door will have two 2.125" holes 5.5" apart. Lockset sold separately

Kit includes:

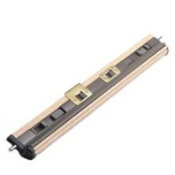
  • Smooth fiberglass door slab
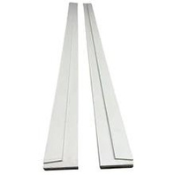
  • Jamb set (hinge jamb, lock jamb, and head jamb) - select left hand/right hand and 4 9/16" if you have 2x4 construction or 6 9/16" if you have 2x6 construction. See pictures for help determining door handing. Pictures of prehung door show the door from the outside of home viewpoint.
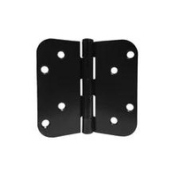
  • Hinges (satin nickel or oil-rubbed bronze finish) with screws
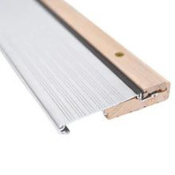
  • Threshold (aluminum mill or bronze finish)
  • Weatherstripping (high reach bronze compression weatherstripping)
  • Corner seals x4 (bronze)
  • Door sweep (bronze)
  • Screws for assembling frame

Note: BrickmoldLockset, and Paint sold separately

Additional specifications:
  • Primed white finish, see our paint category to purchase paint
  • Highest quality smooth fiberglass for easy finishing & durability
  • Composite bottom edge to resist moisture/rotting
  • Comes with a drive-on sweep with 7/8" between darts
  • Wood edge door system for ease of installation and clean look
  • Reinforced 11.75" pine lock block for added security
  • High density polyurethane insulation for maximum thermal efficiency
Finishing & Installation:

If replacing an existing door, remove interior trim (casing) by scoring with a utility knife and carefully prying off the interior wall. Save if you plan on re-using. Unscrew hinges and remove existing door slab. Remove old jambs and threshold, checking for screws from behind the hinges and weatherstripping. Clean the opening.

TOOLS NEEDED: Power drill with Phillips head bit and 1/16" wood drill bit. Scissors. Utility knife. We also recommend towels/rags for supporting door while hanging.

1. Assemble framing (jamb and threshold). Screw head jamb, lock jamb, hinge jamb, and threshold together using included screws. Use 2 screws at each connection point (jamb to jamb, jamb to threshold), drilling pilot holes with a 1/16" drill bit.

2. Install jamb assembly into rough opening. First apply caulking to the sub floor where the threshold will go. We recommended 4 large beads of caulk about an inch apart. Next center the assembly into the rough opening and ensure the lock/hinge side are on the correct side and that the sill slopes towards the exterior of the home. Ensure the four corners are flush with the interior wall and then install shims at each of the four corners (about 4 inches from the top/bottom of the door jamb legs) until the frame is square and plumb (check at each corner using a level). Once the frame is square and plumb, drill pilot holes through the jambs, passing through the shims, and into the rough opening studs behind the shims at each of the 4 corners. Use the included screws to anchor the jamb assembly into place.

3. Hang door into jamb assembly. First attach hinges to the door using the included screws. Next, using towels/rags (sometimes a block of wood helps too) to support the weight of the door against the floor, have a friend or two hold the slab in place while you secure the hinges to the jamb, starting with the top hole of the top hinge and working your way down.

4. Adjust door as needed. Check to make sure the door is square in the opening and swings open/closed easily. Remove anchor screws and adjust shimming as needed. Once the door shims are correct, add shims above and below deadbolt bore and anchor to through jambs into studs, just like you did at each of the four corners.

5. Seal the door. Install weatherstripping, corner seals, and door sweep.

6. Install trim. Install exterior trim (brickmould) using 2 beads of caulking and included finishing nails, nailing on the inside and outside edge of the brickmould about every foot. Re-attach or install interior trim (casing) as needed.

7. Paint the door. Clean the door (get all of the dust debris off of the surface of the door). Click here for our guide on how to paint your door. We recommend our paint or any exterior grade acrylic latex paint.

8. Install the lock. Follow lock manufacturer instruction.