SKU: SE-FSH-2480-SFG-TRM

Trimmable Oversize Fiberglass Entry Door Slab (Flush)

Regular price $599.00

Panel only - does not include jambs (sold separately or as a prehung unit)

Finish: White Satin Smooth
Door features
$599.00

Backordered - typically returns to stock in 2-4 weeks

Description

OVERSIDE DOOR - replacement for wood doors or can be cut down to fit irregular sized opening. Can trim up to 1" off either side (2" total) and up to 10" bottom.

The Pease Fiberglass Door. Replace just your door slab and keep your existing jambs and brickmold. A perfect replacement for Pease (carbon & steel) doors as well as most entry doors by Stanley, Taylor, Mastercraft, Perma Door, Castlegate, Masonite, Therma Tru, Jeld-Wen, Plastpro, and many others. Please make sure to check your measurements (door height, width, and thickness) and feel free to contact us with any measurement or fit questions.

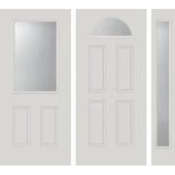
Flush (also known as smooth or without traditional embossed panels) is a great option if you need to install glass that requires a non-standard cutout that wouldn't align with typical panel spacing (e.g., ovals, etc.) This door is also a great choice for homeowners who require a large pet door to be installed without interfering with door paneling.

Door slab does not include glass. Glass options can be found in our door glass section. 

Sizes & Measurements:

Style: Flush (no panels)

Width: Select from - 24", 26", 28", 30", 32", 34", 36", 42"

Height: Select from - 80", 84", 96" 

Thickness: 1.75" (standard for exterior doors)
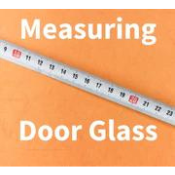
Door Glass (lite cutout prep) compatibility:

  • Width: 24" to 28" wide doors typically take a 15" wide cutout. 30" wide doors get a 21" wide cutout and 32" and wider get a 23" wide cutout
  • Height: For a "full lite" or glass that goes the full length of the slab, 80" and 84" tall doors take a 65" tall cutout. 96" tall doors take an 81" tall cutout
Additional specifications
  • Primed white finish, see our paint category to purchase paint
  • Highest quality smooth fiberglass for easy finishing & durability
  • Composite bottom edge to resist moisture/rotting
  • Door sweep sold separately: drive-on sweep with 7/8" between darts
  • Wood edge door system for ease of installation and clean look
  • Reinforced LVL stiles & full length lock block on both sides of door for added security and strength
  • High density polyurethane insulation for maximum thermal efficiency
Finishing & Installation

1. Before finishing, remove existing door and place onto the new door slab. We recommend placing the existing door slab onto a sawhorse or folding plastic table (just not a surface that could scratch or damage the door). If the door came in a cardboard box it can serve as a nice worksurface to protect the door.

2. Check that the new door width, height, and thickness match the existing door. If you need to trim the door height (up to about 2" is OK), we recommend trimming off the bottom and then use a U style door sweep to seal up the unfinished edge. Trimming the width is a little trickier and you really shouldn't take more than about 1/8" off each side. Best option here is to use a planer tool.

3. Trace hinges onto new door by aligning the existing door on top of new door and tracing with a pencil. Mark each hinge top, bottom, and how far into the door (towards the outside) the hinge needs to seat. We recommend using a combination square to ensure you get the measurements as accurate as possible. If needed, you can also trace the lock bore (holes for the lock) onto the new door as well.

4. Next create the mortise slot for the hinges on new door. We recommend using a utility knife to score the edges of where the hinge will sit. Then, using either a chisel or router, remove the wood and create the recess for each of the hinges.

5. Next we recommend turning the door onto the lock edge so the hinge edge is facing to the sky. Place hinges to their mortise slots and pre-drill hinge holes using a 1/8" or 1/16" drill bit.

6. Screw hinges to the door. We recommend using 2-3" long screws for the top 2 holes on the top hinge. This will help the door fight against gravity and stay square/operating smoothly for longer.

7. Hang the door into the opening. This is a 2-3 person job, depending on how heavy the door is. It can help to use rags or a block of wood to hold the door into position.

Option a: Without removing hinge pins - start by screwing the top hole of the top hinge in first and work your way down.

Option b: Removable hinge pins. If your hinges have removable pins, you can screw one half of each hinge to the door and the other into the jamb, align the door into the opening such that the hinges fit back together and then you can drop the pins back in.

8. Check for smooth operation and for the door to be square in the opening. There should be about 1/8" to 1/4" of space between the lock edge of the door and the jamb. Shim hinges and plane lock edge of door as needed.

9. Install the lock (cutting the bore holes and mortising for the latch and deadbolt as needed). Tip: don't cut all the way through the door with the hole saw -- cut about 2/3 through and then come in from the other side.

10. Clean the door (get all of the dust debris off of the surface of the door)

11. Paint the door. Click here for our guide on how to paint your door. We recommend our paint or any exterior grade acrylic latex paint.